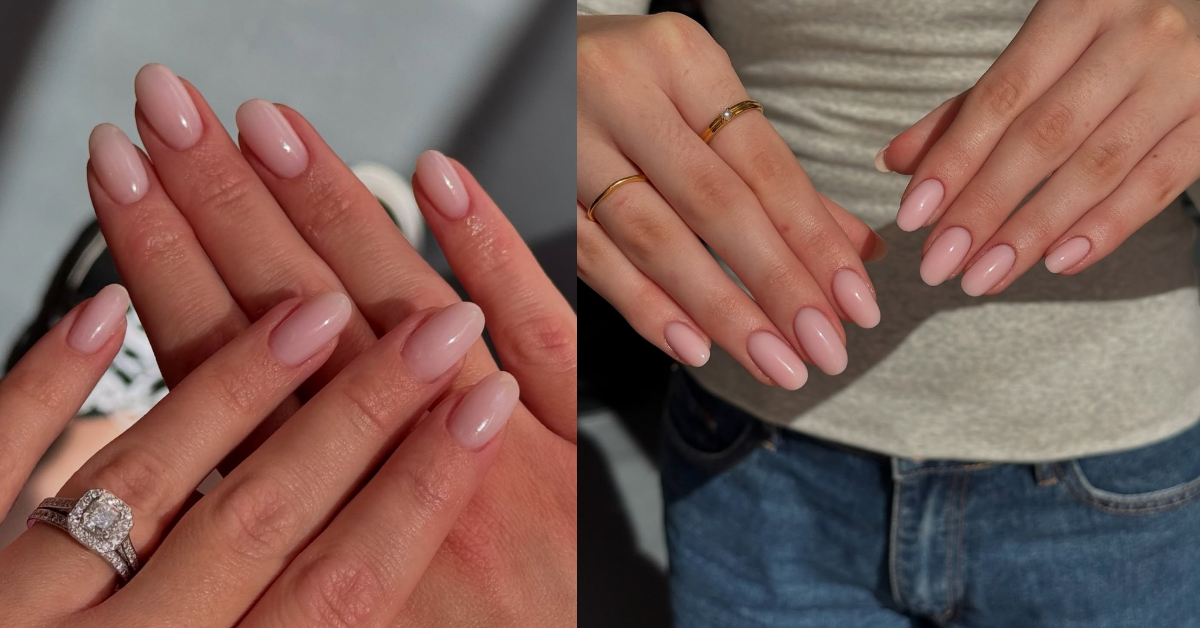
“Soap nails” are that sheer, milky, ultra-glossy manicure that makes your hands look freshly washed and expensive, but not “done.” The nail bed still shows through, the color is whisper-soft (usually pinky nude or milky white), and the shine is the whole point.
The tricky part: sheer polish chips faster if your prep and top coat game is casual, because there’s less pigment and usually less “grip.” So the goal is two things at once:
- that translucent, clean look
- a routine that helps regular polish last closer to a week (or more) without gel
One quick reality check: this won’t work if your nails are peeling badly right now (or you’re picking at edges). You can still do soap nails, but longevity will be limited until the peeling settles.
Quick answer (for skimmers)
- Soap nails = sheer, milky tint + glassy shine + clean cuticles.
- Long wear with regular polish is mostly prep + thin coats + capping the free edge + maintenance top coat.
- Use a grippy base coat (or a strengthening base if you’re peeling).
- Apply 2 to 3 very thin coats of a milky sheer.
- “Wrap the tip” (cap the edge) every coat.
- Use a fast-dry glossy top coat, then refresh top coat every 2-3 days.
- Gloves for dishes and cleaning are not optional if you want it to last.
If you only do one thing: reapply top coat on day 2 or 3. It’s the easiest way to extend wear with regular polish.
What makes soap nails look like soap nails
Soap nails usually have:
- Sheer finish (you can still see the nail line a bit)
- Milky tint (soft white or pinky nude, never stark)
- Very smooth surface (no bumps, no cuticle flooding)
- High gloss that reads like clean, hydrated nails
If yours keeps looking streaky or chalky, it’s usually one of these:
- coats are too thick
- you didn’t let each layer set
- your nail surface is rough (needs light smoothing or ridge-filling base)
The long-lasting at-home soap nails routine (no gel, no lamp)
Step 1: Remove old polish and reset the surface
- Remove polish fully (including around sidewalls).
- Wash hands, then dry completely.
- Lightly file to shape (short-to-medium lengths last longer than long tips with regular polish).
Important: after washing, wait a few minutes. Water swells nails slightly, and polishing immediately after can reduce wear time.
Step 2: Cuticle cleanup (this is where the “expensive” look comes from)
- Push back cuticles gently (after a shower is easiest).
- Trim only true hangnails, not living cuticle.
This is optional. Skip it if cuticle cutting makes you bleed or you tend to overdo it. Slightly imperfect cuticles still look great with sheer polish. Bloody cuticles do not.
Step 3: Dehydrate the nail (the underrated longevity trick)
Wipe each nail with:
- isopropyl alcohol on a lint-free pad, or
- a tiny bit of acetone on cotton (quick swipe)
You’re removing oils so the base coat can bond.
Step 4: Base coat (pick the one that matches your nails)
Base coat is not just “extra.” It helps adhesion and can reduce staining.
Choose one lane:
- If your nails are normal: a sticky/grippy base coat
- If you peel or split: a strengthening base coat (but don’t layer it thick)
- If you have ridges: ridge-filling base (helps soap nails look smooth)
Apply thin, and cap the free edge (drag brush across the tip).
Step 5: The soap nails color (sheer milky layers)
This is the “float” method: don’t press hard.
- Load brush, place slightly away from cuticle, then float it down.
- 2 to 3 thin coats beats 1 thick coat (thick coats wrinkle and dent).
How to avoid streaks with sheers:
- First coat: very sheer and imperfect
- Second coat: even it out
- Third coat (only if needed): focus on the center for that milky blur
Cap the free edge on every coat.
Step 6: Glossy top coat (and why it matters)
Top coat is your wear layer. It protects from micro-scratches and chips, and it gives that “wet soap” shine.
- Apply a generous but controlled layer (don’t flood cuticles).
- Cap the free edge again.
Small trade-off with no perfect solution: the fastest, hardest-wearing top coats can contain stronger solvents and smell more intense. If you’re sensitive, you’ll want ventilation and you may prefer a gentler formula even if it sacrifices a bit of durability.
A note on ingredients: some popular quick-dry top coats include solvents like toluene and carry warnings. If that concerns you, choose alternatives and always ventilate.
Step 7: Drying rules that actually prevent dents
- Give it a solid 20-30 minutes before anything risky (hair washing, tight jeans buttons, bed-making).
- Avoid hot showers right away if you can.
- If you use quick-dry drops, use them after top coat sets (they help surface drying, but don’t magically fix thick layers).
The “make it last” maintenance plan (this is why other people’s polish lasts longer)
Day 2 or Day 3: Refresh top coat
Add one new thin layer of top coat. This is the biggest wear extender with regular polish.
Daily: Cuticle oil, but smart
- Use cuticle oil at night.
- Keep it mostly on skin and around the nail, not flooding under the free edge (too much oil can loosen edges on some people).
Protect from the two biggest chip triggers
- Water exposure (dishes, long baths)
- Cleaning chemicals (sprays, detergents)
If you want your soap nails to last, wear gloves for dishes. It’s boring, but it works.
If you want “gel-like” longevity without gel
There are non-gel lacquer systems marketed to last longer than typical polish and remove with regular remover. One that gets mentioned a lot in beauty coverage is Dazzle Dry, which uses a multi-step system (prep, base, color, top) and is positioned as a gel alternative without a lamp.
I’m not saying you need this. But if you’re chasing 10+ day wear without gel, a system like that can be the simplest route.
FAQ
Why do my sheer soap nails chip faster than darker polish?
Sheers are usually thinner and show imperfections sooner. They need better prep and a top coat refresh.
Do I need to buff my nails?
Only lightly, and only if you have ridges or peeling edges. Over-buffing makes nails thinner and can worsen peeling.
Why does my polish peel off in sheets?
Usually oils/water on the nail plate, skipping base coat, or painting onto cuticle skin. Base coat choice matters here.
Can I do soap nails on short nails?
Yes, and they often look even more “clean” short. Shorter nails also tend to wear longer with regular polish.
What’s the most important “pro-level” trick?
Capping the free edge on base, color, and top coat. It’s tiny, but it reduces tip wear.
Just a little note - some of the links on here may be affiliate links, which means I might earn a small commission if you decide to shop through them (at no extra cost to you!). I only post content which I'm truly enthusiastic about and would suggest to others.
And as you know, I seriously love seeing your takes on the looks and ideas on here - that means the world to me! If you recreate something, please share it here in the comments or feel free to send me a pic. I'm always excited to meet y'all! ✨🤍
Xoxo Frida
